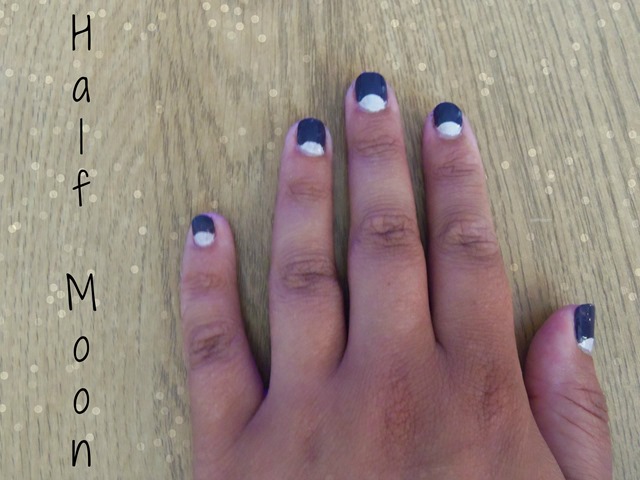
One of my first posts was about my slight obsession with nail varnish. At the time I had around 50 bottles, that has now grown to over 60. I really should stop but I wont. Usually I just do a plain nail but once in a while I’ll be adventurous and do something a little different. My favourite look is the half moon nail which looks a little like this (excuse chubby fingers!)…
It doesn’t take a lot off effort to get this nail look, but I think it looks super effective. Remember to use a lighter colour for the half moon and a darker colour on top.
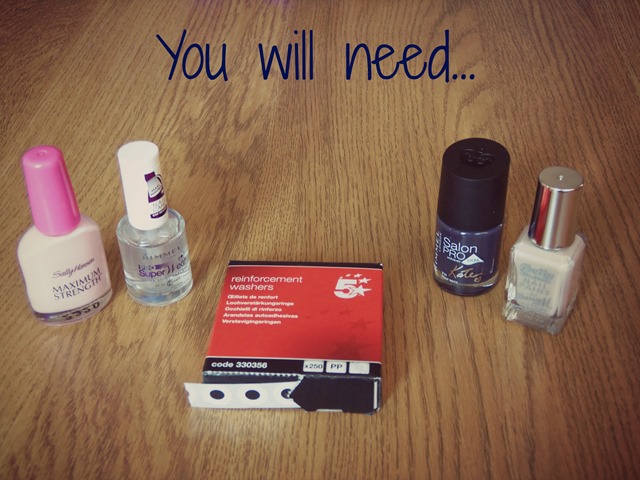
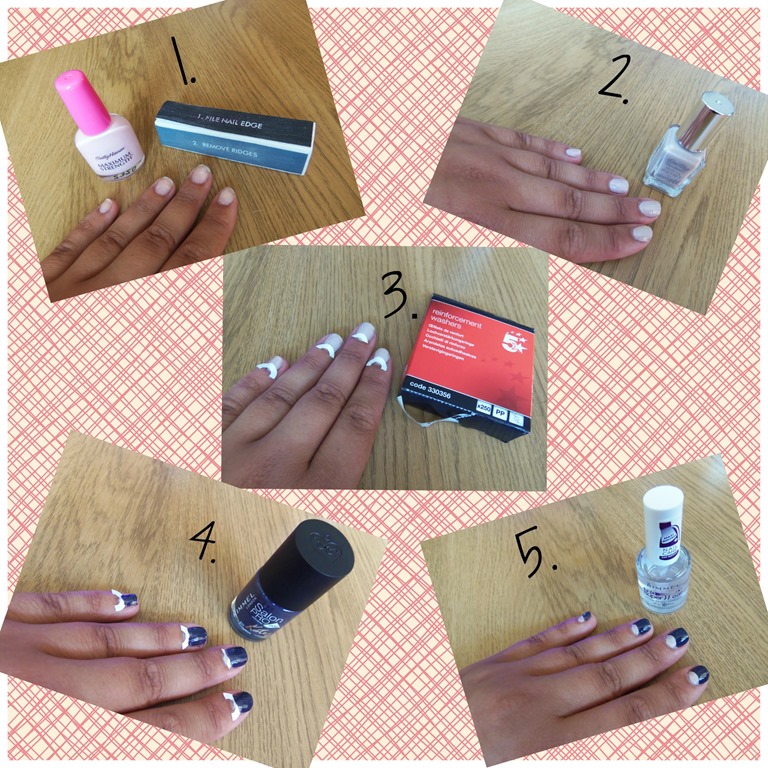
1. Prepare your nails in whichever way you do… I buff mine with a buffer from Boots, and then use Sally Hansen Maximum Strength as my base coat, it’s made my nail strong again!
2. Use a lighter nail varnish and apply one coat (two if you need more coverage). Make sure this coat is smooth or else it will be harder to I’ve used Barry M Gelly Hi-Shine in Lychee because it’s a nice nude colour.
3. Once the lighter coat has dried, put a reinforcement washers near the cuticle so the outer side makes a half moon shape. You can adjust them to make the half moon larger or smaller – it’s up to you, but keep the size consistent or else it’ll look weird. Make sure they’re stuck over the whole nail and right to the edges. I cut my stickers in half to help them last longer.
4. Paint 2 coats on the top part of your nail with the darker colour, my colour is the Rimmel Salon Pro in Punk Rock. Let the coat dry for at least 10 minutes.
5. Once the nails are completely dry carefully peel off the reinforcement washers from each nail and use a top coat. I’ve used Rimmel Pro Super Wear Ultra Shine Top Coat.
Et voila!


No comments:
Post a Comment
Thank you for your comments you lovely bunch!